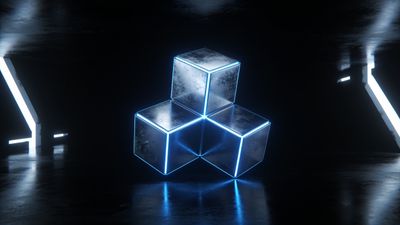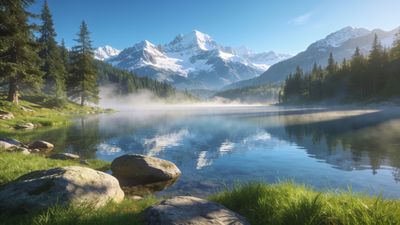

Cinematic lighting can turn a flat AI render into a scene that feels alive. The right prompt language helps models like Midjourney v7 or SDXL Turbo understand how light behaves - from rim highlights to volumetric haze. If your generated wallpapers look dull or overexposed, refining lighting cues is the fastest way to improve realism.
Understanding Cinematic Light in AI Prompts
Film lighting is about shaping emotion through contrast and direction. When you describe lighting in a prompt, you’re teaching the model how to tell a story visually.
- Key light defines the main direction and mood. Words like soft daylight, harsh spotlight, or golden-hour sunbeam change the tone instantly.
- Fill light controls shadow depth. Adding low fill or deep contrast creates drama.
- Rim or backlight separates the subject from the background. Try backlit silhouette or rim light glow for cinematic edges.
- Practical lights like neon signs or candles add believable sources inside the frame.
A simple phrase such as cinematic lighting, volumetric fog, soft rim light often yields more realistic results than vague adjectives like beautiful lighting.
Structuring Prompts for Realistic Wallpapers
AI models respond best to clear, layered structure. Break your prompt into three parts: subject, environment, and lighting.
Example structure:
> Subject: lone astronaut walking through misty forest > Environment: cinematic depth of field, detailed foliage, morning haze > Lighting: soft backlight, volumetric rays, high dynamic range shadows
This pattern keeps the model focused on composition rather than random effects. You can also specify camera terms - wide shot, f1.8 bokeh, or anamorphic lens flare - to mimic film techniques.
For inspiration, study how light interacts in wallpapers like Sunlit Ancient Ruins in Desert Landscape Wallpaper. Notice how the warm highlights and long shadows create depth without oversaturation.
Using Lighting Ratios and Color Temperature
Realistic cinematic scenes rely on contrast ratios and color balance. You can guide AI models with numeric or descriptive cues:
- 1:3 lighting ratio or strong key-to-fill contrast for moody drama.
- Cool shadows, warm highlights for natural daylight balance.
- Blue hour tones or amber tungsten glow for emotional color palettes.
If your render looks washed out, reduce ambient light terms. If it feels too dark, add bounce light or soft fill reflection.
The Light category showcases how subtle tone shifts can define atmosphere - from glowing dusk scenes to high-contrast night portraits.
Prompt Variations for Different Cinematic Styles
Each film genre has its own lighting grammar. Try these prompt fragments to explore variety:
- Noir: low-key lighting, hard shadows, single overhead lamp, monochrome tones.
- Fantasy epic: god rays through ancient ruins, golden haze, high contrast highlights.
- Sci-fi neon: rim light, reflective surfaces, magenta and cyan glow, volumetric fog.
- Romantic drama: soft diffused window light, pastel color grading, shallow depth of field.
Pair lighting cues with composition hints like rule of thirds framing or subject centered in beam of light.
For example, the Epic Superhero Silhouette with Fiery Aura Wallpaper demonstrates how backlight and glow can define a character’s outline without losing detail.
Workflow Tips in Midjourney and SDXL Turbo
Different AI engines interpret lighting prompts uniquely:
- Midjourney v7: Responds strongly to cinematic film terms like cinestill 800T, anamorphic lens, or rim light. Use
--ar 16:9for desktop wallpapers. - SDXL Turbo: Handles physical light cues better when you include HDR, ray tracing, or global illumination phrases.
When testing, render multiple seeds and compare shadow softness. Keep a reference folder of your best outputs and note which wording produced believable light falloff.
If you want to see how AI lighting translates into finished pieces, browse the AI Generated collection for examples with balanced highlights and cinematic tone mapping.
Refining and Post-Processing
Even strong prompts benefit from gentle post-editing. Adjust exposure and contrast curves to match the intended mood. Avoid over-sharpening; cinematic frames often retain a touch of softness.
- Use color grading LUTs or photo filters to unify tone.
- Crop for composition rather than centering every subject.
- Save final exports in PNG to preserve gradient smoothness.
Before publishing, test your wallpaper on both bright and dark displays. A scene that glows on OLED might crush shadows on LCD.
Building a Cinematic Wallpaper Collection
Once you refine your lighting style, create a small set of wallpapers with consistent tone - one daylight, one sunset, one night. This helps viewers recognize your aesthetic.
Consider uploading your best results to the AI Generated category so others can discover your lighting approach. Pair them with tags that describe mood or color temperature.
A good example of balanced color and light is Serene Ocean Waves in Gradient Light Wallpaper, where the gradient illumination feels natural yet stylized.
Next Steps
Experiment with prompt phrasing daily. Swap cinematic lighting for studio lighting or natural rim light and note differences. Keep a log of what each model version interprets best.
By mastering lighting language, you’ll move from generic AI renders to wallpapers that look like stills from a film set. The next time you open your gallery, each frame will tell a story through light and shadow.